Make sure to use pure copper, quality matters. Don’t sacrifice with copper-coated material just to save a couple pennies. And, refrain from using any mesh that’s discolored or showing signs of blue-colored corrosion.
Pure copper will not rust, contaminate, or scratch surfaces, but it does have a lifespan in mesh form. You can prolong its value, and help prevent off-flavors in your product, by cleaning it after every run. And, as soon as it doesn’t look clean—regardless how strict your sanitation protocols are—discard and replace it as necessary.
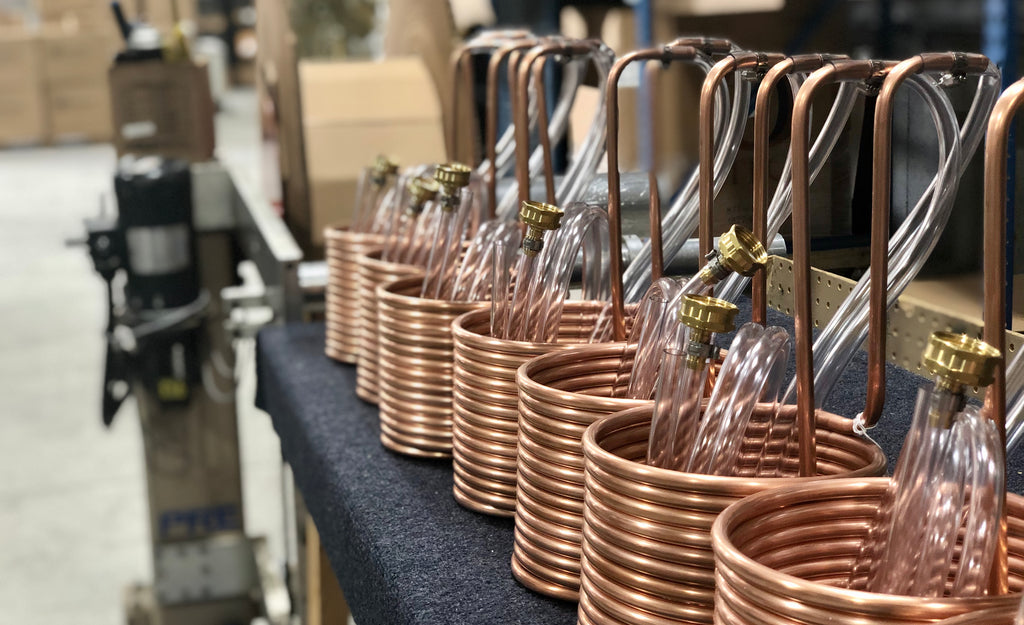
Remove all copper mesh from its column, and allow it to dry. If you suspect that there might be excessive debris or that it might need to be replaced, unroll it to inspect it and then leave it unrolled to expedite drying. Note: You will be rolling it back up so that it can fit in a container to soak (see Step 2).
Dually, it’ll be a near-impossible task to thoroughly clean your column with its packing material still present.
Fill a container approximately twice the size of the rolled-up mesh with your choice of cleaning solution. Popular opinions vary, and include straight citric acid, straight vinegar, a 50/50 mix of vinegar and water, or an environmentally-friendly alkaline cleaner like PBW.
Submerge your copper mesh for a minimum of one hour, up to 24.
Once removed from your cleaning solution, rinse it thoroughly with clean water. Unroll it, (hang it if possible,) and allow it to air-dry completely. Store it dry, in a clean and covered container until your next run.
Rinse and repeat Steps 1-3 until it shows any visible signs of deterioration, including off-coloring.
Similar to Googling almost any food recipe or “How to” resource that allows for some leniency per personal preference, you may also find users suggesting alternative cleaning methods for their copper mesh.
Regardless of the cleaning agent you use, always defer to manufacturer instructions, follow all safety protocols, and proceed at your own discretion and risk.
]]>Copper is the standard material for immersion chillers because of its ability to transfer heat. 3/8" and 1/2" OD soft copper tubing is most widely used and which diameter you choose will depend on the batch size.
Advantages:
Disadvantages:
Relatively new on the scene, stainless steel immersion chillers have gained popularity in the market because of rising cost of copper. Stainless steel chillers can now be purchased for the same cost as a copper chiller of similar dimensions.
Advantages:
Disadvantages:
The chiller you choose will be a personal choice and you can't go wrong with either one. But in our professional opinion, when it comes to chilling a 5-15 gallon batch of wort, nothing comes close to the efficiency of a properly sized copper immersion chiller.
]]>COLDBREAK® immersion wort chillers come supplied 1/16 inch wall vinyl tubing. We use this type of vinyl because it creates a tighter, more reliable seal on the inlet and outlet than thicker tubing. The downside is that the thinner tubing will have a tendency to kink and retain a memory.
Our chillers are supplied with strong stainless steel worm drive hose clamps. We have tested several brands over the years and we have found that Gold-Seal or Ideal-Tridon clamps have been the most reliable. However, they are not indestructible. All hose clamps tend to loosen over time and will need to be checked each time you brew.
Warning! Be careful not to over tighten. Check them regularly and replace when necessary. A well prepared home brewer will always have a few extra hose clamps in stock.
Pictured above: an over tightened hose clamp. Notice the stainless teeth collapse if put under too much stress.
Coldbreak Hard Maple Mash paddles come unfinished. We decided not to treat the paddles because the research we did prior to launching them was that no matter what wood treatment option we chose, we couldn't guarantee that chemicals and oils wouldn't wind up in you mash.
All options had their pros and cons so we left it up to you on how you wanted to take care of your paddle. Here is what we found
Pros: No chemicals come into contact with your mash.
Cons: Wood is very porous. It is very susceptible to mold and rotting if not properly taken care of. It's also hard to sanitize, so do not use it in your wort after the boil.
Pros: Treats the maple and will resist moisture
Cons: May leach oil into mash causing head retention issues.
Pros: Completely seals maple
Con: Harsh chemicals wind up in your mash
Pros: Looks nice
Cons: Harsh chemicals wind up in your mash
Mold does not mean the end of your paddles life. Mold is present on your grain prior to mashing and does wind up in your wort in some way or another. This is one of the reasons we boil our wort, to pasteurize any living organism that may be present. Scrub your paddle to remove as much of the mold as possible. If spots persist, sand it with 200 grit sandpaper.
]]>Your brand new shiny copper immersion chiller will have some residual machine oil left on it, especially near the bends. Its important that you clean your chiller thoroughly prior to first use. Start by washing it with warm water with a mild degreaser (Star degreaser, fragrance free dish soap, etc.). Rinse thoroughly. Then rinse again.
Inevitably, your copper immersion wort chiller is going to tarnish and become slightly deformed. They are manufactured with soft copper, it's science. Rest assured, the performance of your chiller will remain top notch as long as you don't abuse it.
If your immersion chiller ever becomes blue-green (from verdigris—the patina on the Statue of Liberty), you need to remove it before use.
Incase of extreme oxidation and dirtiness, you can also soak your chiller in a diluted distilled white vinegar solution or PBW to get that clean copper shine back. Rinse thoroughly. Then rinse again.
White Vinegar - 6oz / 5 gallons
PBW - 1oz per gallon
Many home brewers will sterilize their chiller in their wort during the last 15 minutes of boil. Another option is to boil the chiller in a separate pot, but its unnecessary if your chiller is relatively clean to begin with. Soaking you wort chiller in StarSan for 20 minutes will brighten and sanitize your chiller.
Star San - 1oz / 5 gallons
When you are done chilling, immediately rinse your chiller or place it into a 5 gallon bucket of water until you can properly rinse it. Do not let it sit out and dry. The hop residue and cold break will dry and stick to the copper making it more difficult to clean.
]]>Before upgrading to a wort chiller, many beginner homebrewers will chill their wort in an ice bath. While this is fine for those that brew only occasional small batches, a wort chiller will quickly become necessary for anyone who is serious about brewing the highest quality beer, efficiently. A wort chiller can literally cut hours out of your brew day, and more importantly, it will significantly reduce the risk of contamination.
A copper immersion chiller is a copper coil that is attached to a garden hose or kitchen sink, where cool water runs internally through the coils and is immersed in the hot wort. The heat from the wort is conducted by the copper and expelled through the chiller's outlet tube, which cools the wort in an extremely efficiently manner. Immersion chillers are most popular among homebrewers.
We manufacture three different sized immersion chillers. They are all made from 100% copper and vary in length. Your wort chiller needs to match your batch size to get the most efficient temperature change and to create a decent cold break.
Small 12.5' - Perfect for the kitchen homebrewer that is making extract batches. Typically, with extract batches you boil a smaller amount of concentrated wort (2-3 gallons) and then add clean cool water before adding the yeast. The 12.5' copper immersion chiller is the perfect size for these batches and easily connects to your kitchen sink (with sink adapter).
Medium 25' - The 25' chiller works well if you are making full boil extract kits or are making smaller all grain batches (4-6 gallons).
Large 50' - The larger 50' chiller work well for all grain brewers making 5-10 gallons of beer.
A counterflow chiller is designed to cool a batch of wort down to yeast pitch-able temperatures in one pass. Wort flows in one direction through the internal copper coil as cool water flows in the opposite direction around the copper coil creating the counterflow effect.
Wort can be pumped through the internal copper coil with a small pump, or gravity fed from your boil kettle. Counterflow chillers are generally designed to be used with a garden hose and come standard with male and female garden hose fittings. This style of chiller is popular in an inline RIMS or HERMS system.
Large plate chillers are usually found in breweries, but there are companies out there that manufacture them on a smaller scale for homebrewing. Homebrew plate chillers use stainless steel plates that are brazed together with copper and, like counterflow chillers, hot wort and cool water flow in opposite directions.
The biggest difference between a professional plate chiller and a homebrew plate chiller is the construction of the plates. Homebrew plates are usually brazed together permanently and disassembly is not possible for proper cleaning (i.e. they have a shelf life). Larger professional plate chillers are not brazed together and brewers routinely disassemble them for proper cleaning.
That is going to depend on your budget, the amount of beer you plan to brew and your ability to clean and sanitize your equipment. Immersion chillers are the easiest to use, the least expensive and the easiest to clean. Plate and counterflow chillers are more expensive and harder to clean but can be more efficient on batches larger than 10 gallons when used and cleaned properly.
]]>